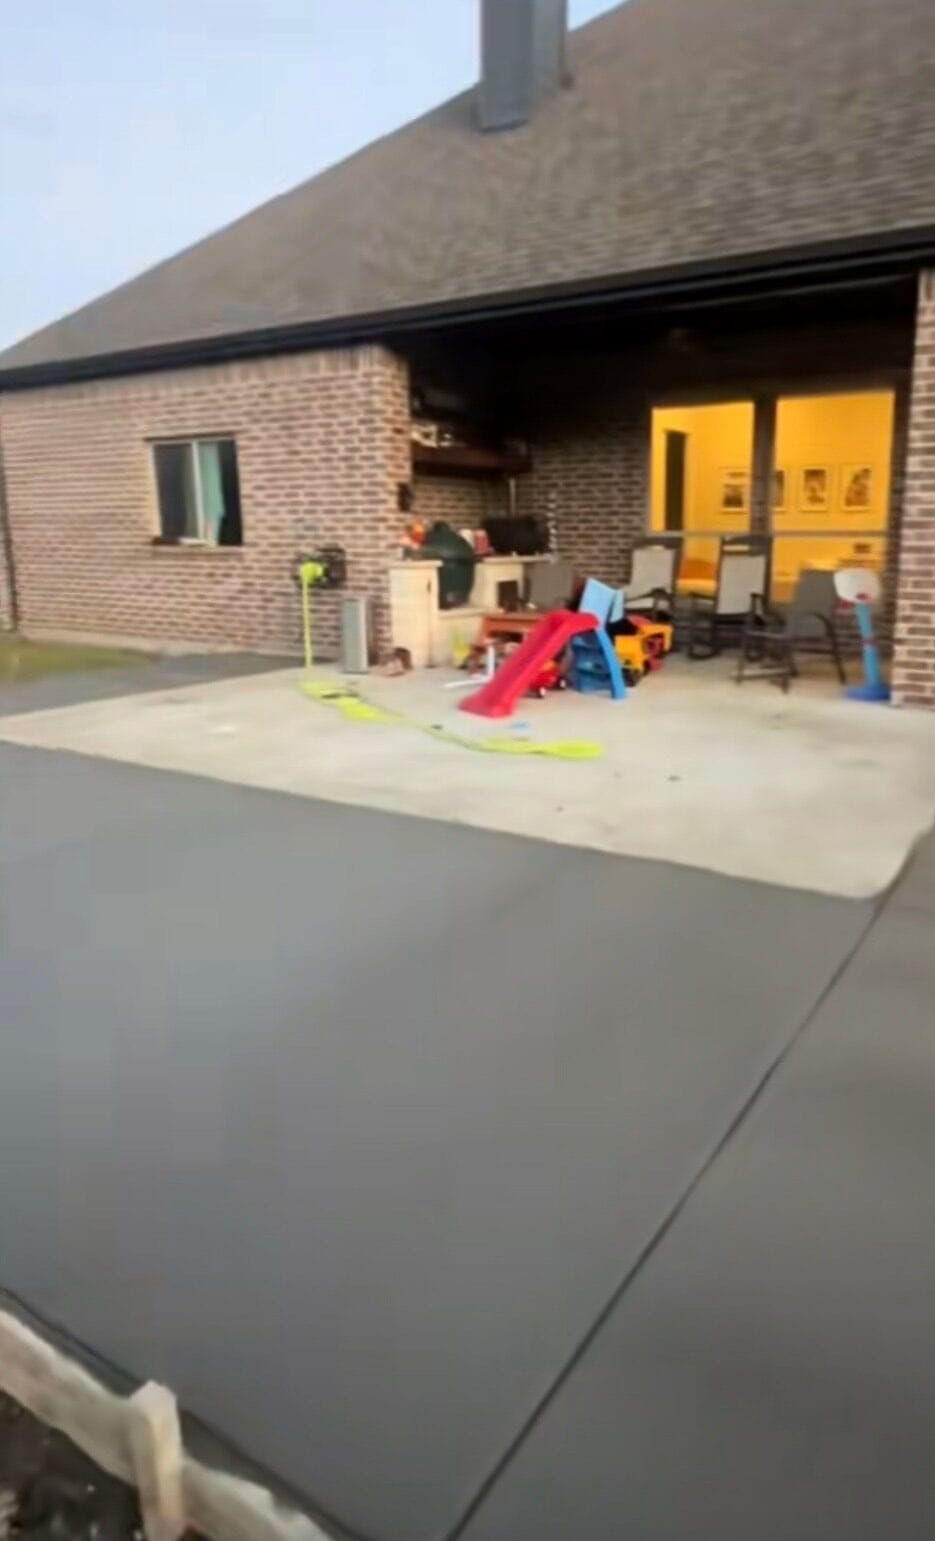
Walk through almost any subdivision built in North Texas in the last twenty-five years and the back patios are all the same: a covered slab roughly ten by ten, sometimes twelve by twelve, sized to satisfy a floor plan rather than to actually hold furniture. It fits a grill and two chairs. Put a table out there and you can't walk around it.
Extending that slab is, dollar for square foot, the cheapest usable space you can add to a house. There's no framing, no roof, no permit in most cases, no interior finish work. It's prep, forms, steel and a pour, and it's typically a two-day job. We've done several of these recently around Dallas and Waxahachie, and they're consistently the job homeowners tell us afterward they wish they'd done years earlier.
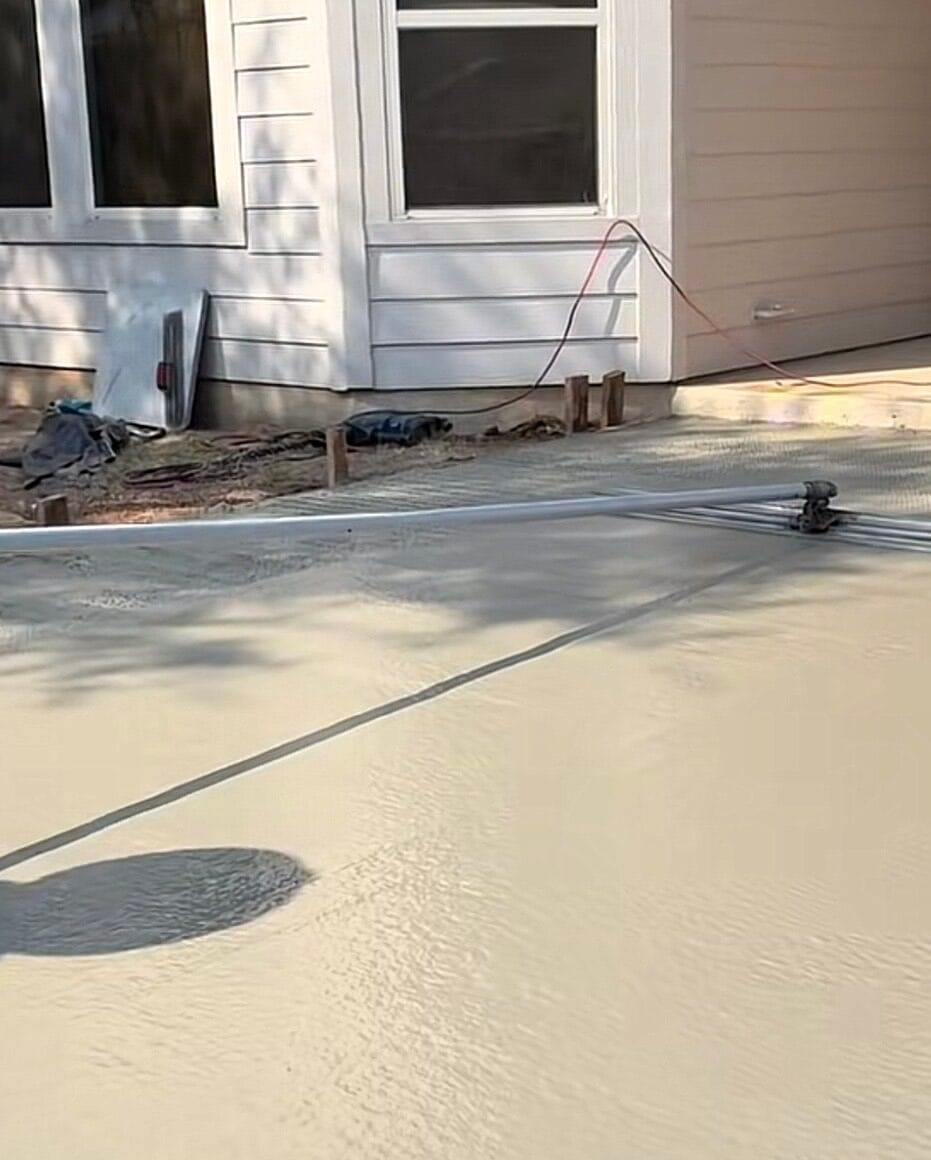
What you're actually buying. A patio extension is a new slab poured off the edge of your existing patio, finished flush with it so the result reads as one larger patio. Sometimes it wraps around a corner of the house. Sometimes it extends straight out into the yard. Sometimes it's a detached pad — a grill area, a fire pit pad, a hot tub base, or a shed slab — connected by a walkway. The add-on we poured in Waxahachie ran along the back of the house to extend the covered area; the Dallas job opened a large new slab off the existing back patio into the yard. Same fundamental work.
Decide the size by furniture, not by feel. This is the single most useful piece of advice in this article, and it costs nothing. Before you call anyone, put painter's tape or a garden hose on the ground in the shape you're considering, then actually set your patio furniture inside it and try to walk around. A dining table for six needs roughly a 12 by 12 area to be comfortable once you account for pulling chairs out. A sectional plus a coffee table wants about 12 by 16. A hot tub needs its footprint plus about three feet of access on the sides you'll use, and it needs to be spec'd as a heavier slab. Every single person who under-sizes a patio extension regrets it, and the incremental cost of another three feet of width at the time of the pour is far lower than adding it later as a second job with its own mobilization, its own forms and its own seam.
Where the water goes. A patio sits directly against your house, which makes drainage the most consequential part of the job and the part most likely to cause you real expense if it's wrong. The slab must slope away from the foundation — the general rule of thumb is about a quarter inch of fall per foot of run. Pour a patio dead level, or worse, sloped back toward the house, and you have built a shallow basin that holds water against your foundation and your siding every time it rains. In North Texas expansive clay, water sitting against a foundation is exactly the mechanism that causes foundation movement. Get this right and it never crosses your mind again.
Two related details worth raising with your contractor: where your downspouts discharge relative to the new slab, since a downspout that used to dump onto grass may now dump onto concrete and run somewhere unhelpful, and whether the new slab height will sit too close to your siding or brick weep holes. Weep holes need to stay clear and above grade; burying them causes moisture problems inside the wall.
Tying into the existing patio. Same principle as a driveway extension. Your existing slab has finished settling, the new one hasn't, and the two need to be either mechanically tied with epoxied dowels or deliberately separated with a proper sealed isolation joint. On a patio this is partly cosmetic and partly functional — a lipped seam across a patio is a genuine trip hazard where people walk in socks and bare feet, not just an eyesore. Ask which method is being used.
Base prep. The ground immediately behind a house is frequently the worst-prepared soil on the property. It's backfill from when the house was built, it's where the downspouts have been discharging, and it's often had a flower bed on it, which means topsoil and organic material. All of that needs to come out and the subgrade needs to be compacted, typically with crushed base over it. The prep shot from our Waxahachie add-on shows what the stage before the pour should look like: forms set to grade, a rebar grid tied and supported, and a uniform compacted base underneath.
Thickness and steel. Four inches over a compacted base with rebar on chairs handles furniture, foot traffic and a grill without trouble. Go thicker for a hot tub — a filled tub with people in it is a genuinely heavy concentrated load, commonly well over 5,000 pounds, and that wants a thicker slab with heavier reinforcement designed for it. Tell your contractor before the pour if a hot tub is even a maybe for the future, because it's a cheap decision now and an expensive one later.
Finish options, and what actually holds up outdoors. A broom finish is the workhorse: cheapest, most slip resistant, and it hides wear well. A smooth trowel finish looks cleaner but gets slick when wet, which is worth thinking about on a surface people walk on barefoot near a pool or a sprinkler. Saw-cut scoring in a pattern is an inexpensive way to make a large slab look considered. Exposed aggregate, stamped patterns, integral color and staining all add material and skilled labor, and are where patio pricing climbs. One honest note on stamped concrete: it looks excellent when new, and it needs resealing every few years to keep looking that way. If you're not going to maintain it, a broom finish will look better in year eight.
Control joints on a wide slab. A patio extension is often a much wider, more open slab than a driveway strip, which means joint layout matters more visually. Joints have to be there — concrete shrinks and cracks, and joints control where. On a patio you can lay them out as a deliberate grid that looks like a design choice rather than a necessity. Ask to see the joint plan before the pour.
Cure time. Walk on it in 24 to 48 hours. Set furniture out after about a week. Wait the full 28 days before a hot tub goes on it. Pouring in Texas summer heat requires an actual curing plan — keeping the surface damp or using a curing compound — because concrete that dries too fast at the surface crazes and dusts. If you're pouring in July or August, ask what the plan is.
Permits, HOAs and setbacks. A ground-level patio slab with no roof generally doesn't need a permit in most DFW municipalities, but there are three things worth checking: whether your city treats it as impervious coverage subject to a limit, whether your HOA requires approval for hardscape changes, and whether the slab encroaches on a rear or side setback or a utility easement. Easements are the one that bites people — pouring concrete over a utility easement can mean it gets cut up later at your expense, and nobody is liable for that but you. If you don't know where your easements are, your plat will show them.
On cost. We won't print a number because the range is genuinely wide: size, thickness, how much excavation and haul-off is involved, access for the truck, whether any drainage work is needed, and the finish all move it substantially. Published 2026 figures for plain gray concrete patio work in DFW generally fall somewhere between $6 and $15 a square foot, with decorative finishes going considerably higher. Use that to sanity-check a quote, not to budget from. What's more useful is that a patio extension is one of the few jobs where going slightly bigger costs proportionally less than you'd expect, because mobilization, forms and crew time don't scale linearly with square footage. If you're on the fence between 12 feet and 15, price both — the difference is usually smaller than people assume.
How to compare quotes. Same list every time, in writing: slab thickness, mix PSI, reinforcement type and spacing, how they're tying into the existing slab, base prep included, excavation haul-off included, and the direction and amount of slope away from the house. That last one is the one almost nobody asks about and the one most likely to cost you real money if it's wrong.
We pour patio extensions, slab add-ons, hot tub pads and shed slabs across Dallas, Ellis, Johnson and Tarrant County — Dallas, Waxahachie, Midlothian, Venus, Red Oak, Glenn Heights, Cedar Hill, DeSoto and throughout the metroplex. We'll come out, tape the footprint with you so you can see the real size before committing, walk the drainage, and put it in writing. Free written estimates, and we'll beat any comparable written quote. Call 972-921-9488.
Free Estimate, Same-Day Service
We'll beat any written quote in the metroplex.